8. Build the Demo
The application project comes with two pre-configured launchers: one to launch the application on the simulator and the other one to compile the application for the i.MX RT595 EVK Rev. C1.
8.1. Build on Simulator
- Right click on
com.microej.demo.watch.vgliteproject. - Click on
Run as>MicroEJ Application. - Select
(Sim) com.microej.demo.watch.vglite Main.launch. - Click on
OK.
Before launching the application, some generators are running (image and font generators). Then application on simulator starts.
=============== [ Initialization Stage ] ===============
=============== [ Converting fonts ] ===============
=============== [ Converting images ] ===============
=============== [ Launching on Simulator ] ===============
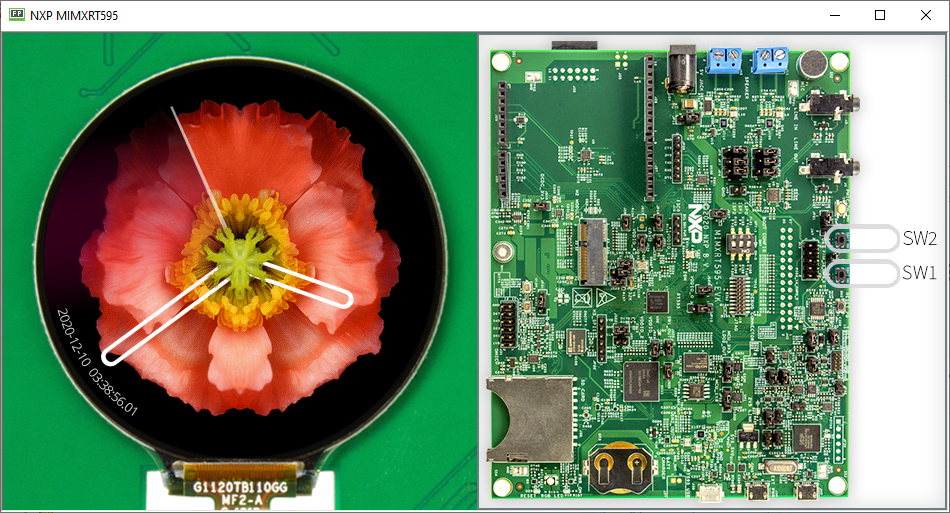
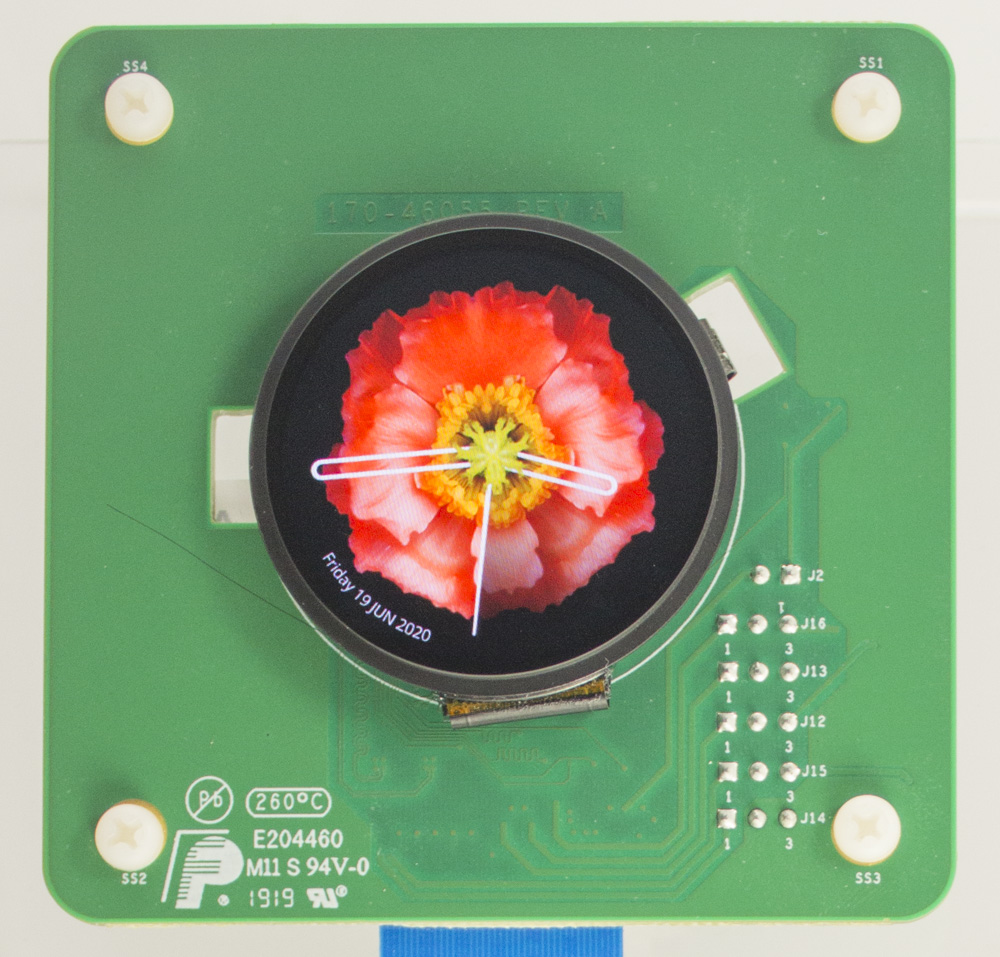
Another window appears: it is a mock which allows you to change some data like heart rate value. This mock is connected on corresponded application services. When the service is interrogated, the mock returns the adequate answer.

Note
The mock is embedded in the platform. However it is possible to compile again a new mock. Please consult chapter Wearable Mock.
8.2. Build on Device
8.2.1. BSP Connection
The platform has been designed to copy its files (platform header files, platform C archive and compiled application C archive) into a compatible BSP. The application launcher for embedded device must be first configured to target the BSP for the i.MX RT595 EVK Rev. C1 (this BSP is available in the package) before launching the application compilation.
Note
Retrieve more information about BSP connection here.
Follow the next steps to configure the launcher for embedded device:
- Go to the unzipped package folder :
[root]/bsp/mimxrt595_freertos-bsp. - This folder is the BSP project root folder; copy the full path of this folder.
- Open MicroEJ SDK.
- Open menu
Run>Run Configurations.... - From the list on the left, select launcher
(Emb) com.microej.demo.watch.vglite Main.launch. - Open
Configurationtab. - Go to the item
Device>Deploy - Scroll to see last text field (3rd-party BSP project) and paste the full path of BSP project root folder.
- Click on
Apply. - Click on
Close.
Note
The embedded launcher is now configured to target the BSP project. No need to configure it again.
The following error occurs when the launcher for embedded is executed without BSP configuration:
=============== [ Initialization Stage ] ===============

FAIL
Please specify the BSP project location (application option 'deploy.bsp.root.dir'), or disable option 'deploy.bsp.microejapp'.
8.2.2. Evaluation License
The platform requires a MicroEJ Evaluation License to compile the application for embedded device. To install a license, launch the application compilation: follow same steps than simulator (select (Emb) com.microej.demo.watch.vglite Main.launch instead of (Sim) com.microej.demo.watch.vglite Main.launch):
- Right click on
com.microej.demo.watch.vgliteproject. - Click on
Run as>MicroEJ Application. - Select
(Emb) com.microej.demo.watch.vglite Main.launch. - Click on
OK.
The execution starts and stops abrutly; the following trace is displayed:
=============== [ Initialization Stage ] ===============
Platform connected to BSP location '[...]\mimxrt595_freertos-bsp' using application option 'deploy.bsp.root.dir'.
[INFO ] Launching in Evaluation mode. Your UID is 0123456789ABCDEF.

[ERROR] Invalid license check (No license found).

FAIL
Java returned: -1
This trace mentions the Machine UID (0123456789ABCDEF). This code is required by MicroEJ licenses server to generate a license for your computer.
- Copy the Machine UID.
- Go to https://license.microej.com.
- Click on
Create a new account link. - Create your account with a valid email address. You will receive a confirmation email a few minutes after. Click on the confirmation link in the email and login with your new account.
- Click on
Activate a License. - Set
Product P/N: to9PEVNLDBU6IJ. - Set
UID: to the UID you copied before. - Click on
Activate. - The license is being activated. You should receive your activation by email in less than 5 minutes. If not, please contact support@microej.com.
- Once received by email, save the attached zip file that contains your activation key.
- Create the direcory
C:\Users\%USERNAME%\.microej\licenses(launch Windows Command Prompt and type commandmkdir C:\Users\%USERNAME%\.microej\licenses). - Copy the license zip file in this directory.
MicroEJ Evaluation License is now installed in your environment. You can launch again the compilation for device (see next chapter).
8.2.3. Compile Application
This chapter considers the two mandatory steps BSP Connection and Evaluation License have been performed.
- Right click on
com.microej.demo.watch.vgliteproject. - Click on
Run as>MicroEJ Application. - Select
(Emb) com.microej.demo.watch.vglite Main.launch. - Click on
OK.
Before compiling the application, some generators are running (image and font generators). Then application is compiled (SOAR, partial link) and deployed in the BSP project (deployment).
=============== [ Initialization Stage ] ===============
Platform connected to BSP location '[...]\mimxrt595_freertos-bsp' using application option 'deploy.bsp.root.dir'.
[INFO ] Launching in Evaluation mode. Your UID is 0123456789ABCDEF.
=============== [ Converting fonts ] ===============
=============== [ Converting images ] ===============
=============== [ Launching SOAR ] ===============
=============== [ Launching Link ] ===============
=============== [ Deployment ] ===============
MicroEJ files for the 3rd-party BSP project are generated to '[...]\com.microej.demo.watch.vglite\com.microej.Main\platform'.
The MicroEJ application (microejapp.o) has been deployed to: '[...]\mimxrt595_freertos-bsp\projects\microej\platform\lib'.
The MicroEJ platform library (microejruntime.a) has been deployed to: '[...]\mimxrt595_freertos-bsp\projects\microej\platform\lib'.
The MicroEJ platform header files (*.h) have been deployed to: '[...]\mimxrt595_freertos-bsp\projects\microej\platform\inc'.
=============== [ Completed Successfully ] ===============

SUCCESS
As described, the platform files (header files and platform C archive) and compiled application C archive are available in the application temporary folder ([...]\com.microej.demo.watch.vglite\com.microej.Main\platform) and copied too in BSP project.
8.2.4. Compile BSP
The BSP project available in package is already configured to compile its C files against the platform header files and to link against platform and application archives.
- Unplug the board.
- Ensure JP18 and JP19 are closed.
- Change DIP switches (SW7) to OFF,OFF,ON (ISP0,ISP1,ISP2).
- Plug an USB cable on J40.
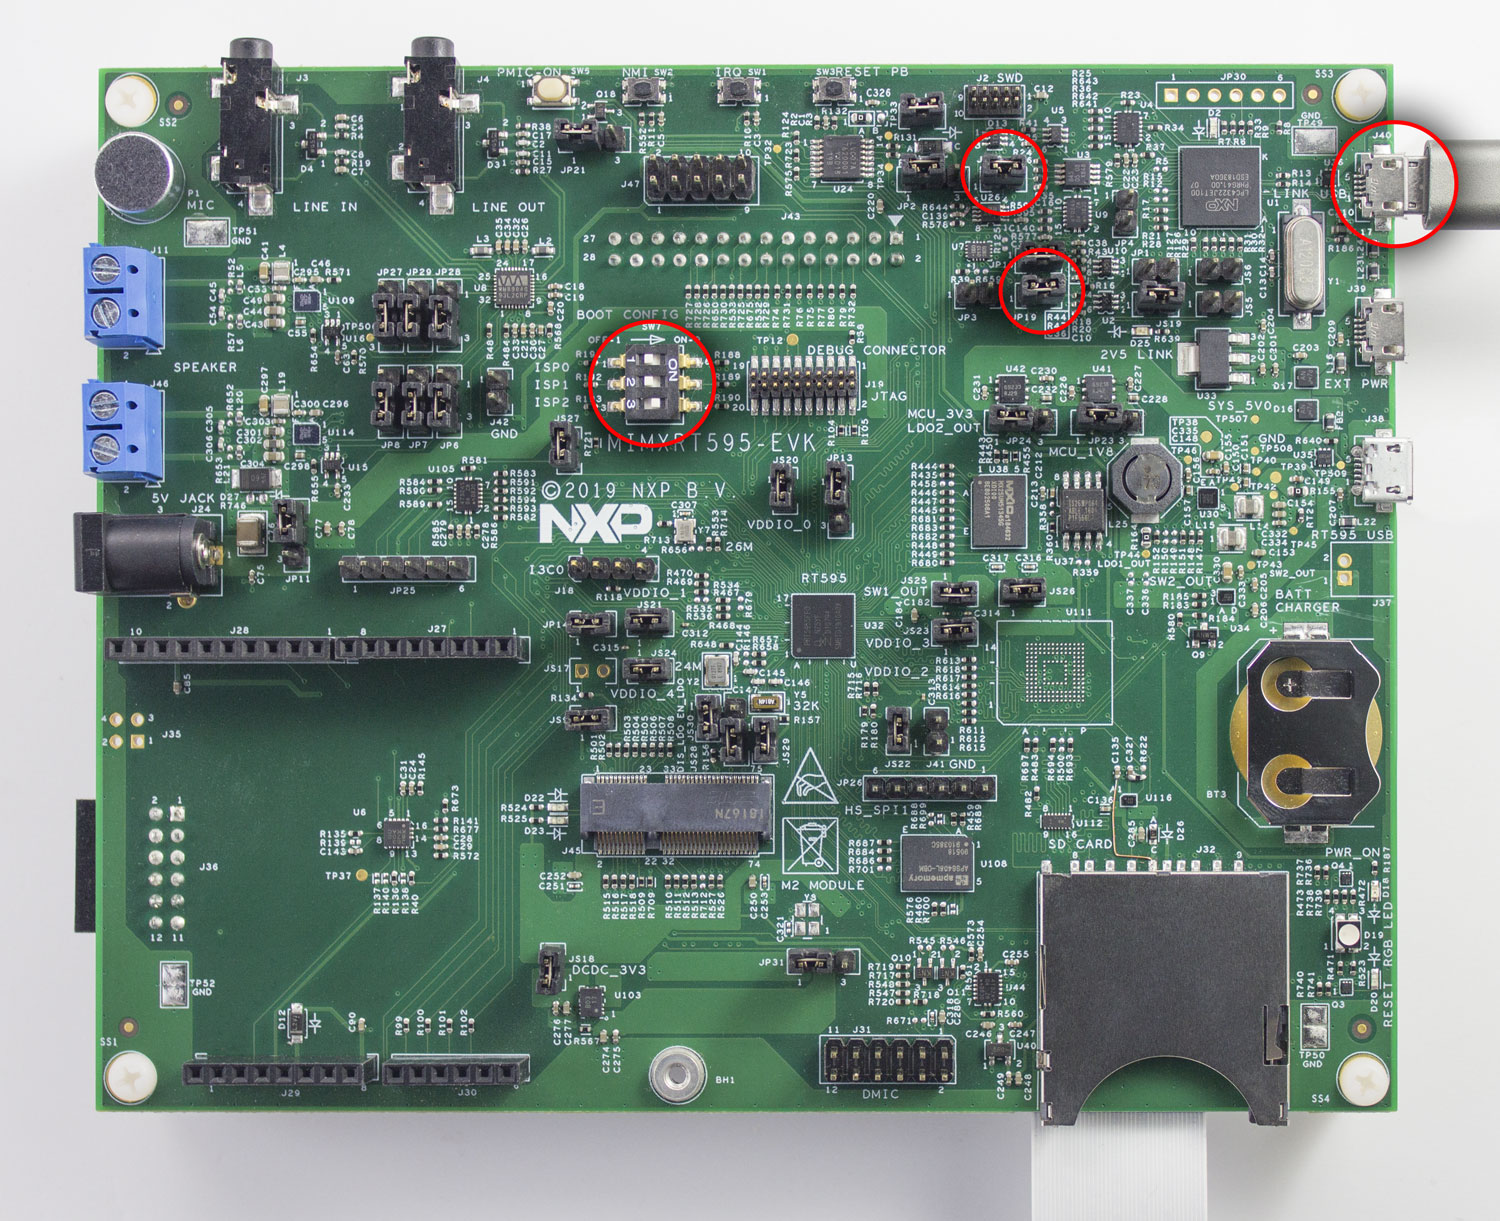
- Open IAR project
[root]/bsp/mimxrt595_freertos-bsp/projects/microej/iar/microej_freertos.eww. - Click on
Project>Make. - After link step, click on
Project>Download>Download Active Applicationto download the application on device. - After download step, press
Resetbutton to start the application.
Note
The BSP project is configured to deploy application using CMSIS-DAP. See BSP project options to select JLink or another probe.
8.3. Wearable Mock
8.3.1. Description
The wearable mock is used for the simulation of the application. It allows you to change heart rate and power level to simulate hardware sensors.
The user can dynamically change the heart rate in two modes: by zone and by value. When by value mode is selected, the heart rate value is set by the slider. On the other hand, when by zone mode is selected, the heart rate will be automatically updated by picking a random value between Low and High bounds.
The power level value can be changed by moving the slider. When Charge mode is selected, the power level will increase by two percent every five seconds, whereas the value will decrease by one percent every second if Discharge mode is selected. The slider is automatically updated to follow charge or discharge.
8.3.2. Setup
The mock source files are available in the packaging. This project allows to build again the mock (for instance to change a behavior, a widget etc.). To install it in your workspace, follow these steps:
- Go to the unzipped package folder :
[root]/application/. - Copy the full path of the file
mock-src.zipavailable in this folder. - Open MicroEJ SDK.
- Open menu
File>Import.... - Go to the item
General>Existing Projects into Workspace. - Click on
Next >. - Select radio button
Select archive file. - Paste the
mock-src.zipfull path and pressEnter(or browse to select it from file system). - Ensure project
com.microej.demo.watch.mockis checked. - Click on
Finish.
8.3.3. Build and Use
Next steps explain how to build the mock and how to add in the MicroEJ platform for i.MX RT595 EVK Rev. C1:
- Select the project (click on it):
com.microej.demo.watch.mock - Click on blue button (like platform build). The new mock is built and pushed in your personal repository.
- Build again the platform (see Platform Build).
- Launch the application on the new platform. The new mock is now used.
Note
The mock is embedded in the MicroEJ platform because the platform configuration project expresses the dependency <dependency transitive="false" org="com.microej.demo.watch.imxrt595" name="mock" rev="..." />.
8.3.4. Use without Building
Another solution to use easily your mock available in your workspace consists to enable an option in your MicroEJ preferences.:
- Open menu
Window>Preferences>MicroEJ>Settings - Check the option
Resolve Foundation Library in workspace. - Click on
Apply and Close - Launch the application on the platform. The new mock is now used.
This tip prevents to build the mock and the platform. Source files are directly used.
 Docs
Docs Resources
 Forum
Forum